Table of Contents
You can agree with us that no website is complete without header. Did you know that you have two different options to create header in WordPress? In this tutorial we will explain individual differences.
Genuine Header image
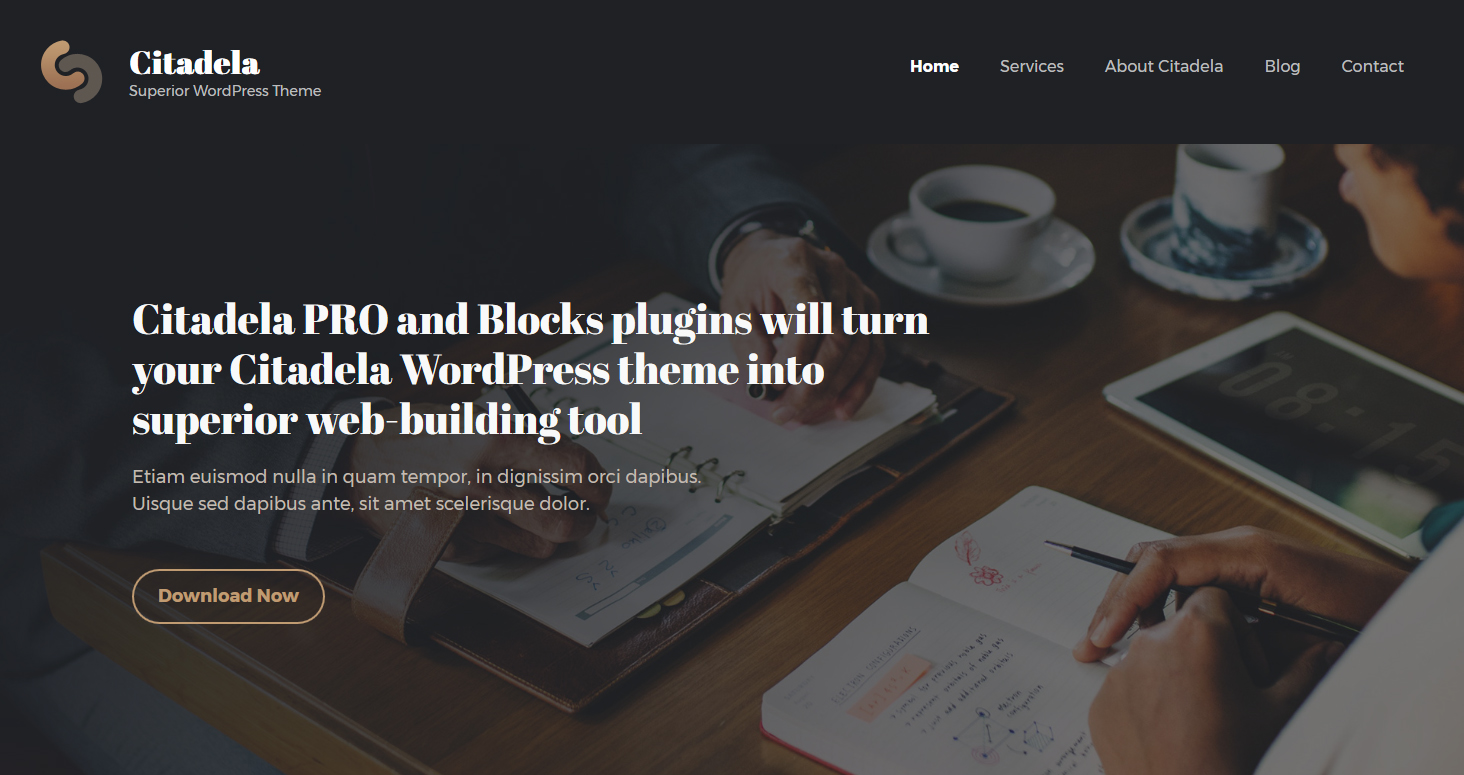
Classic WordPress header as you know it is used across all different pages. It’s usually a wide rectangular box from side to side. Inside there is a logo or website name, tagline and menu items. You can also insert there a background image that’s called header image. Header image is great to attract visitors attention and to create overall website look & feel. It’s up to you to decide whether you use discreet header image or dominant image that will focus visitors attention to website navigation.
How to edit header in WordPress Customizer
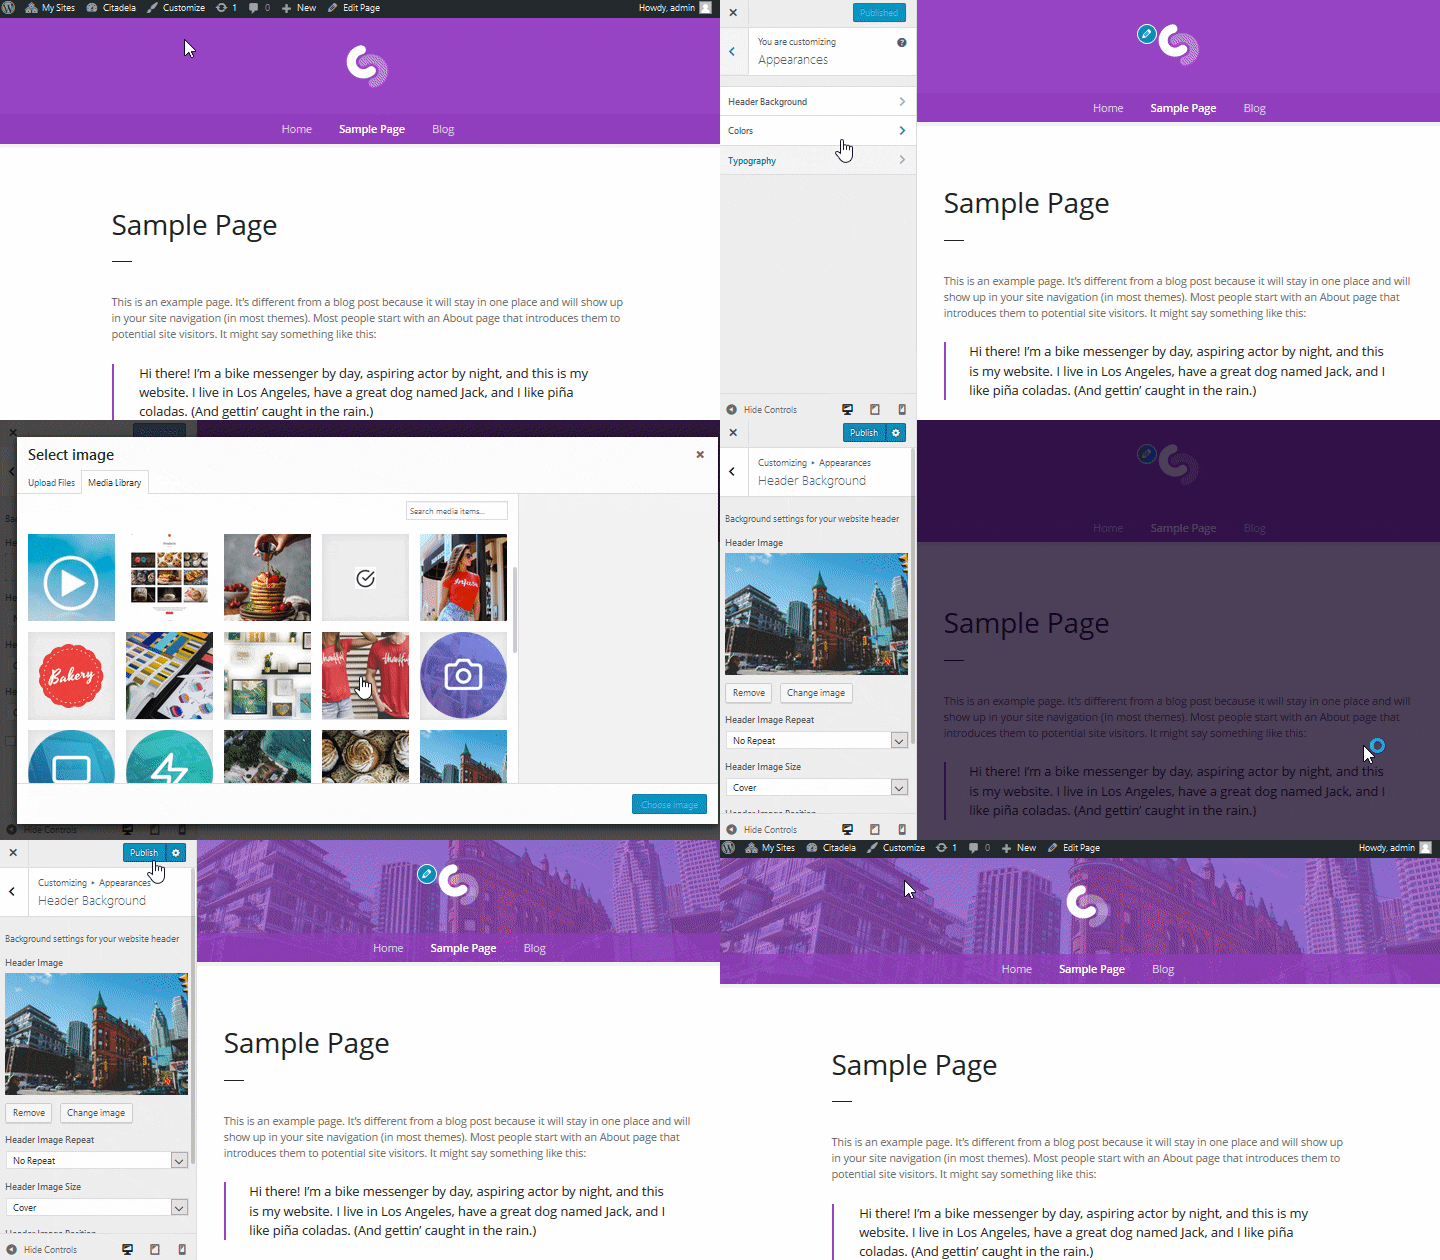
By default, header image can be changed via WordPress Customizer. You can access it both from WordPress admin and from your website:
- Directly from WP admin, just navigate to Appearance –> Customize
- On frontend, if you are logged in, click on “Customize” in the top bar
Customizer includes all basic appearance settings of your currently active theme. Therefore where to find header image settings depends on your active theme. In Citadela theme you can add and edit header image in Customizing –> Appearance –> Header Background.
Header image settings
No matter what header image you choose, you can configure it to your needs. Interesting effect can be achieved using “Header Image Repeat”. You can configure the following options:
- Tile
- Tile Horizontally
- Tile Vertically
- No Repeat (if you do not want to repeat the image)
Other settings in WordPress – Header image size
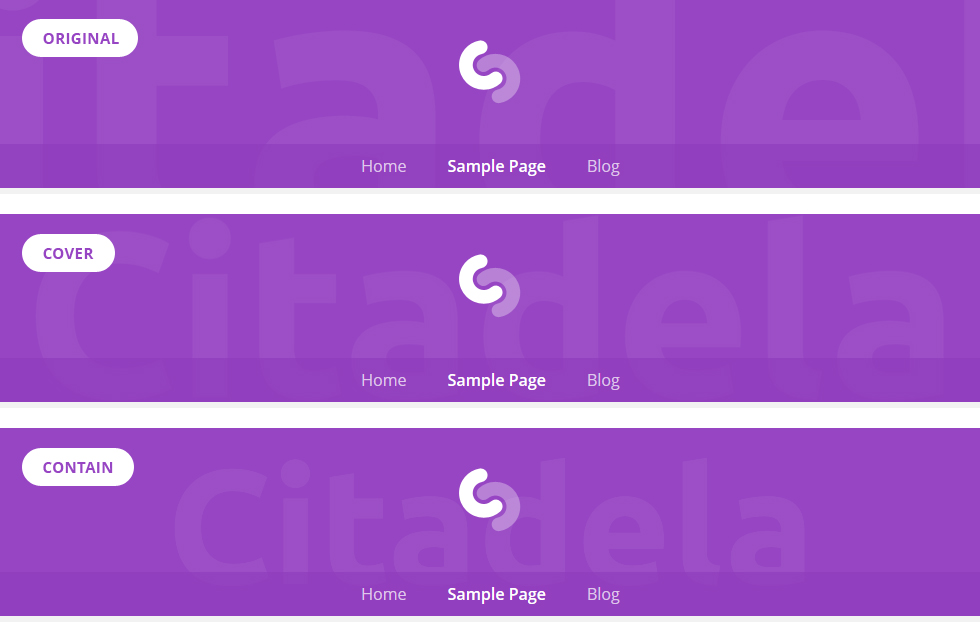
Another option how to edit header and adjust image is to set suitable size. Header image size has the following three options:
- Original – it’ll keep original image size
- Cover – uploaded image will be resized to fit from side to side, image can be also cut to fit
- Contain – header image size will be adjusted the way, that the whole image will be visible
You can also set image position within header and set background fixation.
Cover block that works as header
As we already mentioned at the beginning of this article, there are several ways how to edit header in WordPress editor. In addition to using Customizer you can also use one of core WordPress blocks called Cover block. So what’s the difference?
Classic header created with Customizer relates to whole website, while Cover block allows you to add cover image that basically works as header image to any page or post. You can even use it several times on one page or post with different settings.
Where to use Cover block
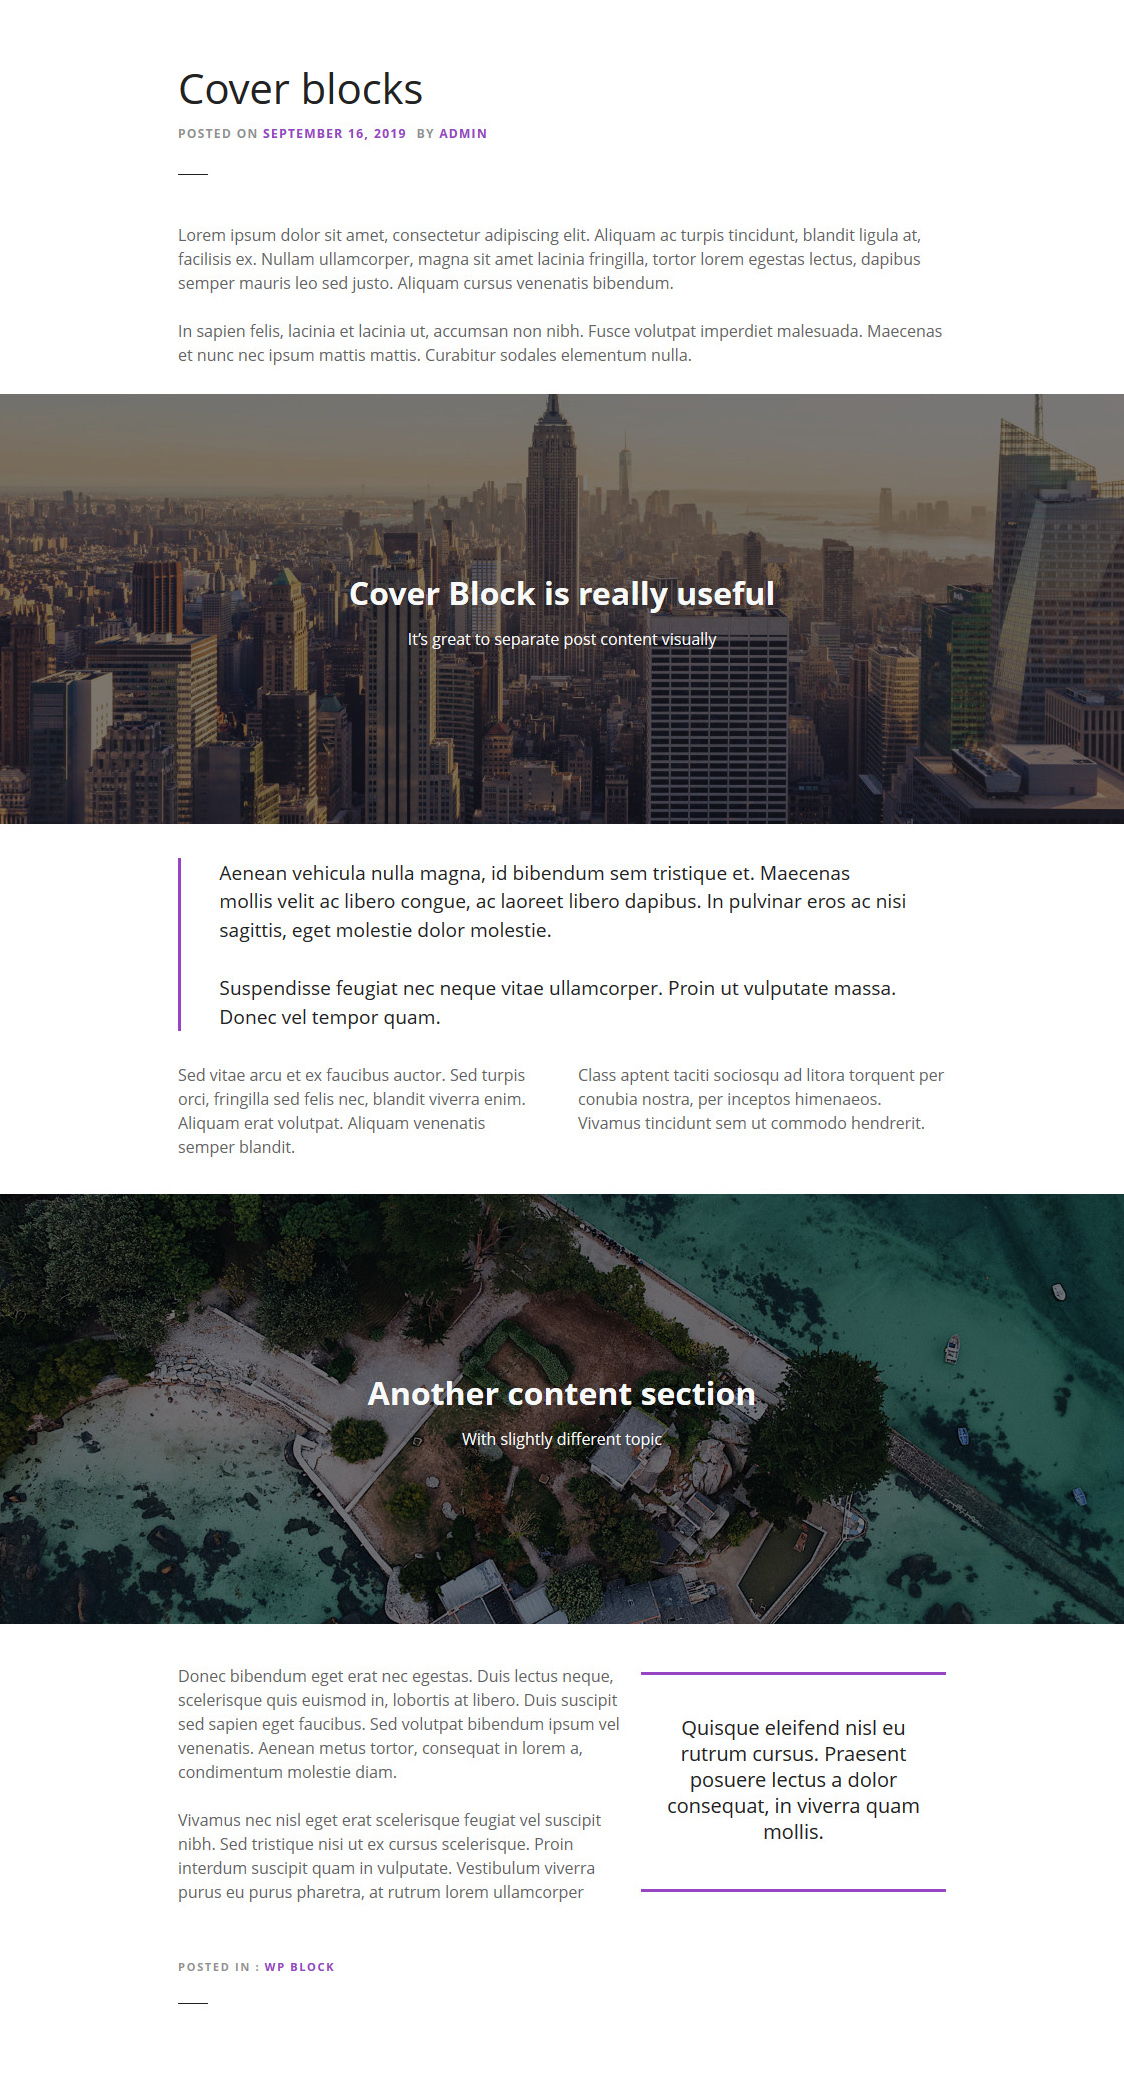
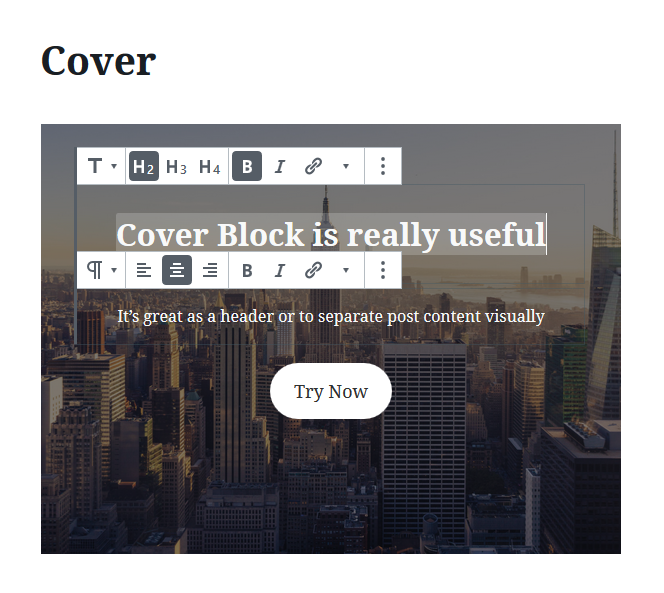
Cover block has wider application across website in comparison to classic website header. Cover block adds wide, full width title image into content. You can use it to visually separate content in blog posts. Each post section will get it’s own header image that can be connected to the following content. Great feature is that you can write text right inside Cover block. This text will be displayed over the image.
Homepage header
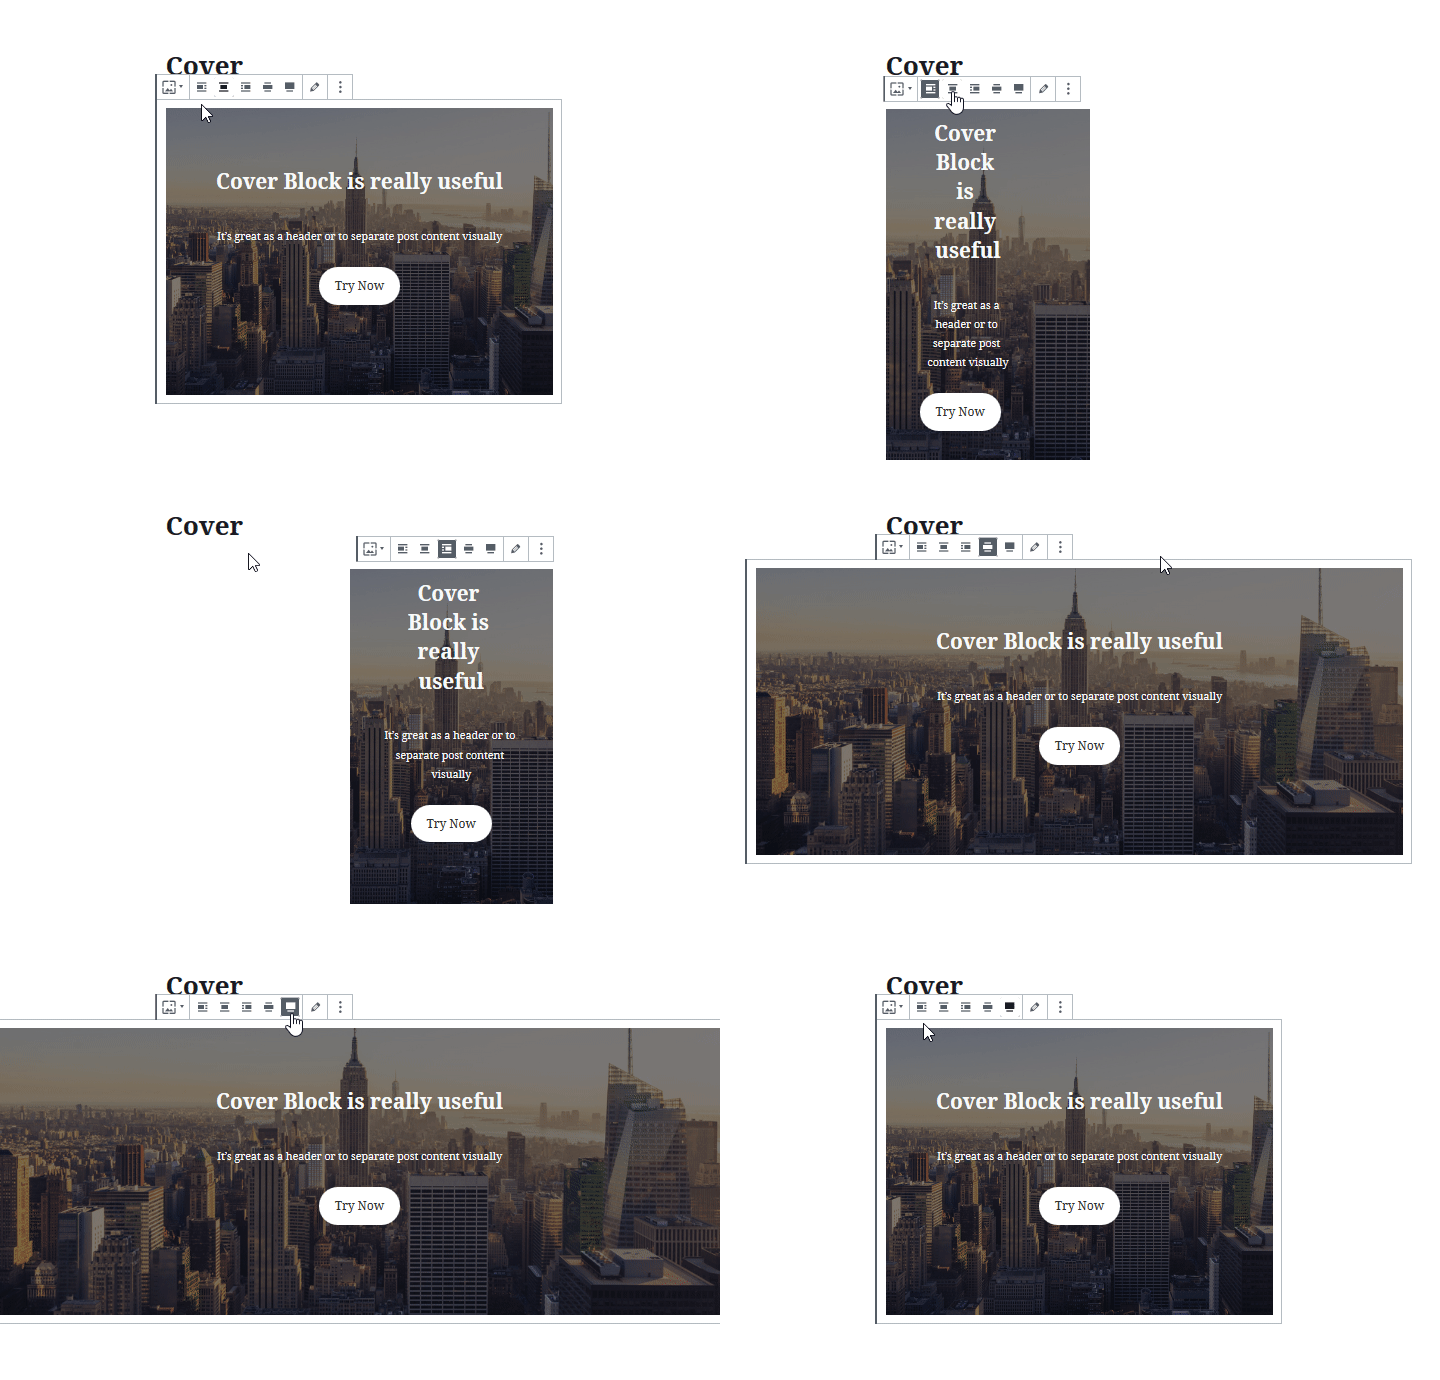
Cover block can be also used instead of website header if you want to achieve original look. Because Cover block provides various alignment options, you can set it to content width or make it full width. Full width header can be also used as large background image. But don’t forget about switching off Page title in Citadela theme. This step is necessary if you’d like to use Cover block as website header.
How to create header using Cover block
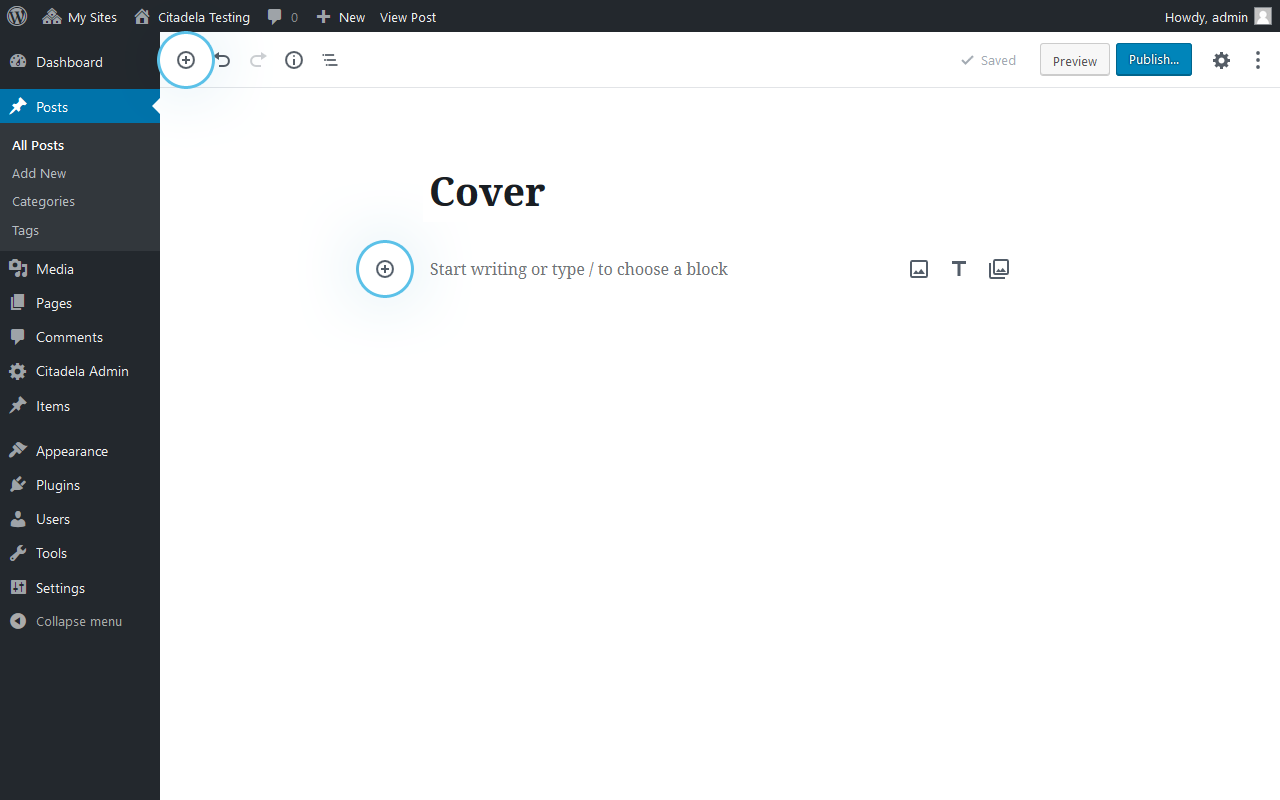
As a first thing you need to add Cover block. You can add it to any page or post the following way:
Click on “+” sign in the top bar or “+” sign anywhere in the content. After that simply search for Cover block.
Another quick way is to add block using “/” following block name.
After adding Cover block you’ll get a space to upload image or video. You can also select image from Media library. Selected image or video will be used as header.
Header title
Interesting thing with header added using Cover block is, that you can write text title over the image. This title can be also used as header for section, for example in blog posts. It is also possible to add there any URL.
Aligning Cover block
Cover block can be aligned using block toolbar. It can be aligned within content area to the left, right or center. It can be also set as wide or full width. These options have to be supported by active theme that you use to build your website.
Cover image settings
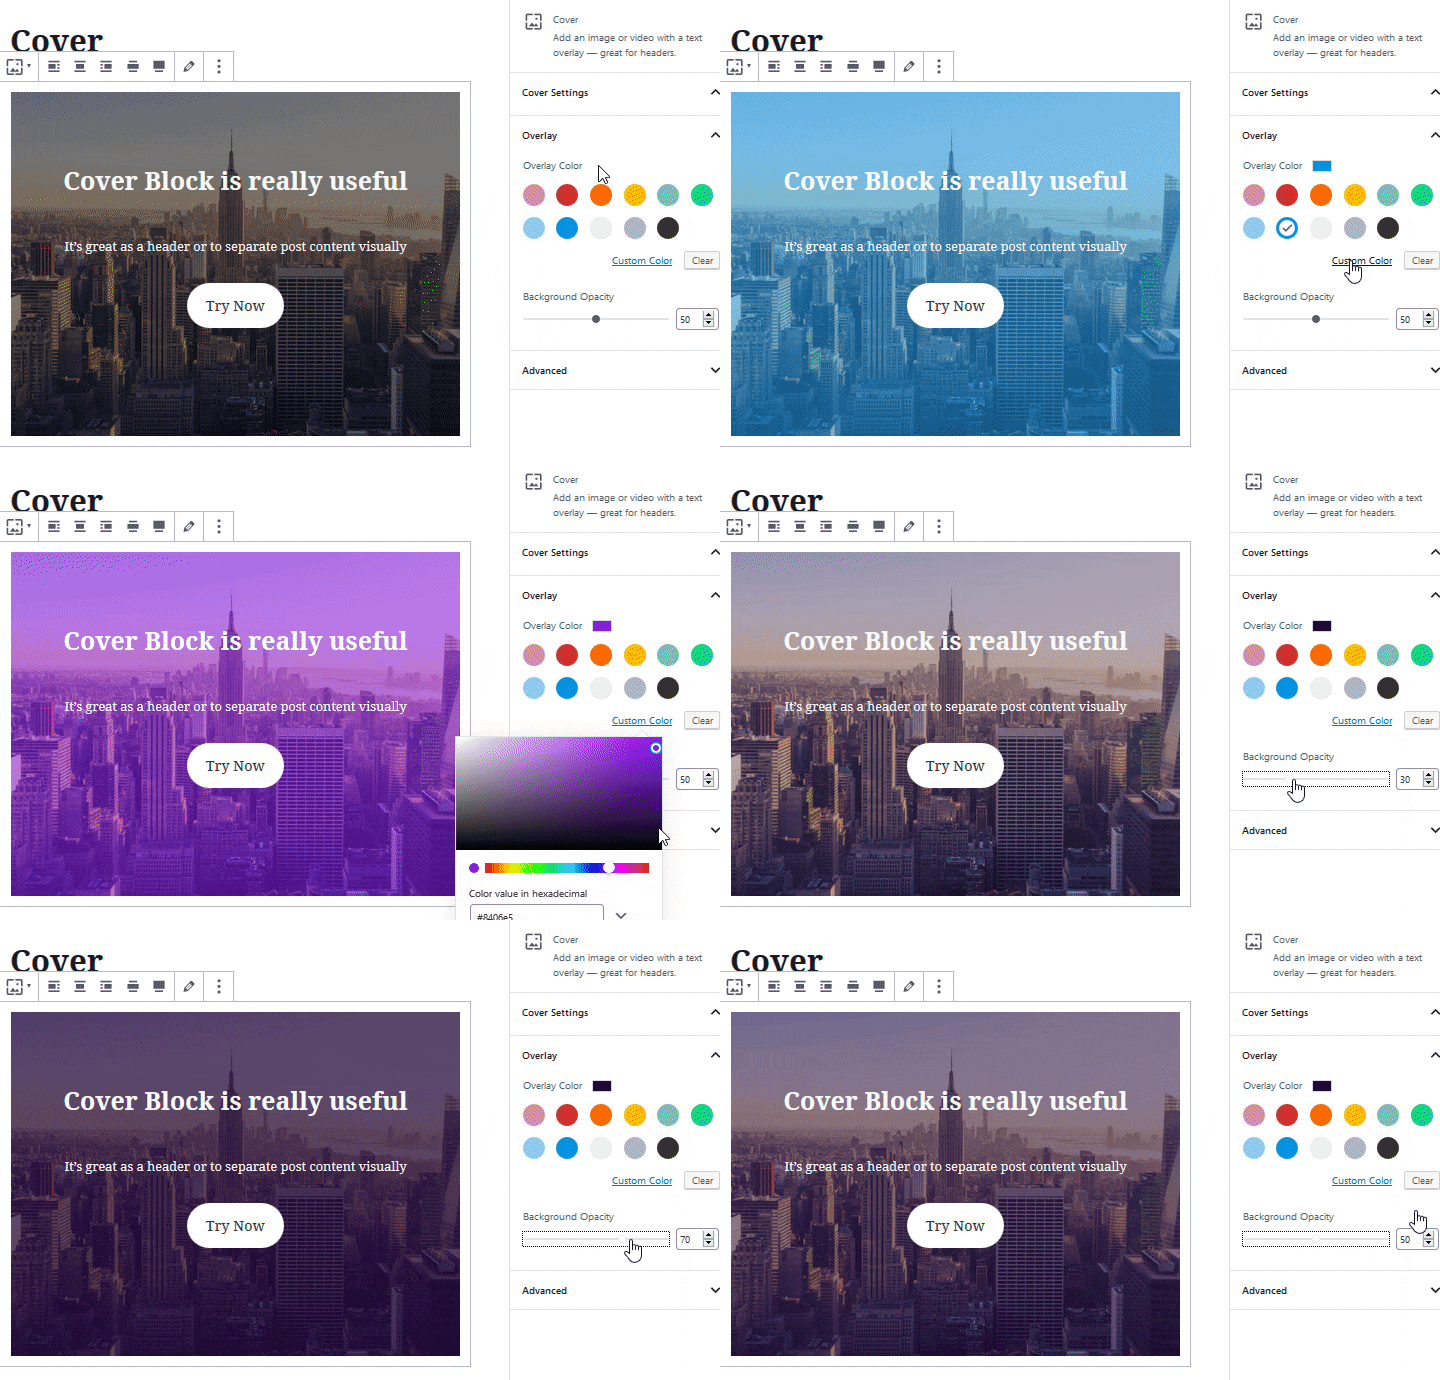
Cover image appearance can be modified in Inspector. If you set it as fixed background, image won’t scroll with the rest of the content on your page but it will stay on it’s place all the time.
Using Focal Point Picker you can choose which part of the image will be displayed in the header. You can work with the image even further. For example you can set Overlay color and Background opacity. Both setting will help you put finishing touches to your header. If you use Cover block inside blog post, using correct color scheme and transparency you can add desired atmosphere to your post. Be careful with these settings as title text needs to be clearly visible.
Making video header
Cover block can be also used to play video inside your website header. You can catch visitors attention or promote product or service. There are several supported video formats, most common you can use is .mp4.
Great thing is that you can also write title over the video, align it, make it full width or set Color overlay. Settings for Cover block are the same for all media types.
What is your experience with headers? Have you already tried Cover block to create header? Do you prefer classic website header using WordPress customizer? Let us know in the comments below.

